Get Started with TMS for Merchants
Accept cards, digital wallets, and alternative payment methods through one API integration.
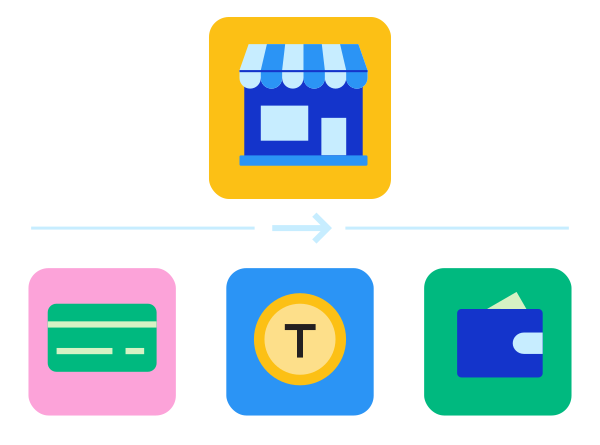
This guide walks merchants through setting up Token Management Service (). Choose the integration model that matches how you use :
Provision and manage network tokens directly through as a standalone service, independent of payment processing. handles token provisioning, cryptogram generation, and life-cycle updates.
Register for a Sandbox Account
Complete the Sandbox Registration Form
To create an evaluation account, visit the appropriate Evaluation Account Sign-Up page for your region. To complete the registration process, follow the email instructions that you received to activate your merchant account, and log in to the .
Send your merchantID to your representative supporting you with integration to create a vault and enable with network tokens. For background on merchant ID (MID) types and hierarchy, see Board a Merchant with TMS.
Create API Keys
Create a Shared Secret Key
Create a REST API shared secret key to authenticate the requests you send to . You must create separate keys for the test and production environments.
Log in to the :
- Test:
- Production:
On the left navigation panel, choose Payment Configuration > Key Management.
Click + Generate key on the Key Management page.
Under REST APIs, choose REST – Shared Secret and then click Generate key.
The REST API Shared Secret Key page appears.
Click Download key.
The .pem file downloads to your desktop. The Key value is your key ID and the Shared Secret value is your shared secret key.
To create or submit another key, click Generate another key. To view all of your created keys, go to the Key Management page.
For more information, see REST API Keys.
Create a Token Management MLE Key
Message-Level Encryption Keys
You must use token management message-level encryption (MLE) keys in order for personally identifiable information, such as payment information, to be returned unmasked by . You must create an MLE security key for your merchant account in the before a response can return unmasked payment information using MLE.
MLE keys can be created at the portfolio and transacting levels of an organization. You must create an MLE key at the portfolio level of an organization if you want to use a single MLE key for the encryption and decryption of payment information for multiple merchants. To do so, you must log in to the using your portfolio credentials and ensure that the MLE key is generated for your organization.
MLE keys expire after 3 years.
Security keys can be used to make any request, including payments. Treat your security keys as you would any secure password.
You must use separate keys for the test and production environments.
Before You Begin
You must have a tool such as OpenSSL installed on your system.
To create an MLE key, you must first extract a public key. You can use a tool such as OpenSSL to extract the key:
openssl genrsa -out private.pem 2048 && openssl rsa -in private.pem -outform PEM -pubout -out public.pemFollow these steps to create a Token Management MLE key:
Log in to the :
- Test:
- Production:
On the left navigation panel, choose Payment Configuration > Key Management.
Click + Generate key.
Select Token Management MLE and click Generate Key.
Enter the public key value into the text field, and click Create Key.
On the Key Management page, select Message Level Encryption from the Key Type drop-down list to view your keys.
Select your key.
To change the status of the key from Inactive to Active, click Change Status.
Click Confirm to change the status of the key.
Enable Network Tokenization
Network tokenization replaces a customer's primary account number (PAN) with a network token. A network token is a tokenized card number that is issued by card networks (for example, Visa, Mastercard, American Express, and Discover). Network tokens use the same format as a PAN but are domain-restricted and cryptographically secured. This reduces exposure to fraud and data breaches.
For more information about how network tokens work and their benefits, see Network Tokens.
Network token enablement is currently a manual process and requires a request to be sent to support. For more information about network token enablement, visit the Support Center:
Tokenize Payment Information
Provision a network token for a card number using the Tokenized Cards API, then retrieve, refresh, and remove that token as needed.
For details on authenticating and constructing requests to the API, see Requesting the Token Management Service.
Provision a Network Token
Create a network token for a card number.
POST /tms/v2/tokenized-cards
POST /tms/v2/tokenized-cards
View API Sample Request
{ "source": "ONFILE", "card": { "number": "X622943123116478", "expirationMonth": "12", "expirationYear": "2026" }}{ "_links": { "self": { "href": "/tms/v2/tokenized-cards/518CA1611EF98697E063AF598E0ADFB9" }, "instrumentIdentifier": { "href": "/tms/v1/instrumentidentifiers/7031530000033441624" } }, "id": "518CA1611EF98697E063AF598E0ADFB9", "object": "tokenizedCard", "state": "ACTIVE", "enrollmentId": "15372f0f2bdf79725a1516de0288de01", "tokenReferenceId": "8d40eed53be76d63c665111dc1d46e01", "paymentAccountReference": "V0010013025104530884197510742", "number": "489537XXXXXX1624", "expirationMonth": "12", "expirationYear": "2034", "type": "visa", "card": { "suffix": "6478", "expirationMonth": "12", "expirationYear": "2026" }, "source": "ONFILE"}For the full set of required fields, see Network Tokens.
Retrieve Network Token and Cryptogram
Generate standard payment credentials, including the network token value and cryptogram, for an existing tokenized card.
POST /tms/v2/tokens/{tokenId}/payment-credentials
POST /tms/v2/tokens/{tokenId}/payment-credentials
View API Sample Request
{}The {tokenId} is the tokenized card ID returned in the id field when you provisioned the network token. The response is a JSON Web Encryption (JWE) payload; for details on decrypting it, see Payment Credentials.
Retrieve Latest PAN Suffix and Expiration Details
Retrieve the current state of a network token, including the latest PAN suffix and expiration details.
GET /tms/v2/tokenized-cards/{tokenizedCardId}
GET /tms/v2/tokenized-cards/{tokenizedCardId}
View API Sample Request
{ "_links": { "self": { "href": "/tms/v2/tokenized-cards/223ACDECF1681954E063A2598D0A786D" }, "instrumentIdentifier": { "href": "/tms/v1/instrumentidentifiers/7040890000006625091" } }, "id": "223ACDECF1681954E063A2598D0A786D", "object": "tokenizedCard", "state": "ACTIVE", "enrollmentId": "FM4MMC00001441368fa429c85a5d4df5ad1875bfd2faa5eb", "tokenReferenceId": "DM4MMC1US0000000a7fab5f3a27e49daaf1984f7b49ab2f6", "number": "521415XXXXXX5091", "expirationMonth": "10", "expirationYear": "2027", "type": "mastercard", "card": { "suffix": "0747", "expirationMonth": "12", "expirationYear": "2031" }, "source": "ONFILE"}The {tokenizedCardId} is the tokenized card ID returned in the id field when you provisioned the network token. For details, see Network Tokens.
Delete Network Token
Remove a network token that you no longer need.
DELETE /tms/v2/tokenized-cards/{tokenizedCardId}
DELETE /tms/v2/tokenized-cards/{tokenizedCardId}
View API Sample Request
DELETE /tms/v2/tokenized-cards/223ACDECF1681954E063A2598D0A786DFor details, see Network Tokens.
Subscribe to Network Token Updates
Create a digital signature key, then create a webhook subscription to receive notifications about network token lifecycle events, such as provisioning, updates, and device binding.
Create a Digital Signature Key
You must create a digital signature key to enable to send notifications to your servers.
POST /kms/egress/v2/keys-sym
POST /kms/egress/v2/keys-sym
View API Sample Request
{ "clientRequestAction": "CREATE", "keyInformation": { "provider": "nrtd", "tenant": "merchantName", "keyType": "sharedSecret", "organizationId": "merchantName" }}{ "submitTimeUtc": "2021-03-17T06:53:06+0000", "status": "SUCCESS", "keyInformation": { "provider": "NRTD", "tenant": "merchantName", "organizationId": "merchantName", "keyId": "bdc0fe52-091e-b0d6-e053-34b8d30a0504", "key": "u3qgvoaJ73rLJdPLTU3moxrXyNZA4eo5dklKtIXhsAE=", "keyType": "sharedSecret", "status": "Active", "expirationDate": "2022-03-17T06:53:06+0000" }}Create a Webhook Subscription
Subscribe to network token lifecycle event notifications.
POST /notification-subscriptions/v1/webhooks
POST /notification-subscriptions/v1/webhooks
View API Sample Request
{ "organizationId": "merchantOrgId", "productId": "tokenManagement", "url": "https://www.yoursite.com/webhooks/tms/notifications", "eventTypes": [ "tms.networktoken.provisioned", "tms.networktoken.updated", "tms.networktoken.binding" ]}{ "submitTimeUtc": "2023-04-12T10:15:30+0000", "status": "SUCCESS", "webhookId": "a1b2c3d4-e5f6-7890-abcd-ef1234567890", "organizationId": "merchantOrgId", "productId": "tokenManagement", "url": "https://www.yoursite.com/webhooks/tms/notifications", "eventTypes": [ "tms.networktoken.provisioned", "tms.networktoken.updated", "tms.networktoken.binding" ]}Get Details on a Webhook Subscription
Retrieve the details of an existing webhook subscription.
GET /notification-subscriptions/v1/webhooks/{webhookID}
GET /notification-subscriptions/v1/webhooks/{webhookID}
View API Sample Request
{ "submitTimeUtc": "2023-04-12T10:15:30+0000", "status": "SUCCESS", "webhookId": "a1b2c3d4-e5f6-7890-abcd-ef1234567890", "organizationId": "merchantOrgId", "productId": "tokenManagement", "url": "https://www.yoursite.com/webhooks/tms/notifications", "eventTypes": [ "tms.networktoken.provisioned", "tms.networktoken.updated", "tms.networktoken.binding" ]}For details on retrieving, updating, and deleting webhook subscriptions, see Webhooks.
Create and manage tokens as part of your payment authorization flow on . This extends your existing payment flows with minimal changes, while manages token life-cycle and transaction handling.
Register for a Sandbox Account
Complete the Sandbox Registration Form
To create an evaluation account, visit the appropriate Evaluation Account Sign-Up page for your region. To complete the registration process, follow the email instructions that you received to activate your merchant account, and log in to the .
Send your merchantID to your representative supporting you with integration to create a vault and enable with network tokens. For background on merchant ID (MID) types and hierarchy, see Board a Merchant with TMS.
Create API Keys
Create a Shared Secret Key
Create a REST API shared secret key to authenticate the requests you send to . You must create separate keys for the test and production environments.
Log in to the :
- Test:
- Production:
On the left navigation panel, choose Payment Configuration > Key Management.
Click + Generate key on the Key Management page.
Under REST APIs, choose REST – Shared Secret and then click Generate key.
The REST API Shared Secret Key page appears.
Click Download key.
The .pem file downloads to your desktop. The Key value is your key ID and the Shared Secret value is your shared secret key.
To create or submit another key, click Generate another key. To view all of your created keys, go to the Key Management page.
For more information, see REST API Keys.
Create a Token Management MLE Key
Message-Level Encryption Keys
You must use token management message-level encryption (MLE) keys in order for personally identifiable information, such as payment information, to be returned unmasked by . You must create an MLE security key for your merchant account in the before a response can return unmasked payment information using MLE.
MLE keys can be created at the portfolio and transacting levels of an organization. You must create an MLE key at the portfolio level of an organization if you want to use a single MLE key for the encryption and decryption of payment information for multiple merchants. To do so, you must log in to the using your portfolio credentials and ensure that the MLE key is generated for your organization.
MLE keys expire after 3 years.
Security keys can be used to make any request, including payments. Treat your security keys as you would any secure password.
You must use separate keys for the test and production environments.
Before You Begin
You must have a tool such as OpenSSL installed on your system.
To create an MLE key, you must first extract a public key. You can use a tool such as OpenSSL to extract the key:
openssl genrsa -out private.pem 2048 && openssl rsa -in private.pem -outform PEM -pubout -out public.pemFollow these steps to create a Token Management MLE key:
Log in to the :
- Test:
- Production:
On the left navigation panel, choose Payment Configuration > Key Management.
Click + Generate key.
Select Token Management MLE and click Generate Key.
Enter the public key value into the text field, and click Create Key.
On the Key Management page, select Message Level Encryption from the Key Type drop-down list to view your keys.
Select your key.
To change the status of the key from Inactive to Active, click Change Status.
Click Confirm to change the status of the key.
Enable Network Tokenization
Network tokenization replaces a customer's primary account number (PAN) with a network token. A network token is a tokenized card number that is issued by card networks (for example, Visa, Mastercard, American Express, and Discover). Network tokens use the same format as a PAN but are domain-restricted and cryptographically secured. This reduces exposure to fraud and data breaches.
For more information about how network tokens work and their benefits, see Network Tokens.
Network token enablement is currently a manual process and requires a request to be sent to support. For more information about network token enablement, visit the Support Center:
Tokenize Payment Information
For details on authenticating and constructing requests to the API, see Requesting the Token Management Service.
Store Customer Payment Details
Create a customer token with validated payment details by including TOKEN_CREATE in a payment authorization request.
POST /pts/v2/payments
POST /pts/v2/payments
View API Sample Request
{ "clientReferenceInformation": { "code": "TC50171_3" }, "processingInformation": { "commerceIndicator": "internet", "actionList": [ "TOKEN_CREATE" ], "actionTokenTypes": [ "customer", "paymentInstrument", "shippingAddress" ] }, "orderInformation": { "billTo": { "country": "US", "lastName": "Deo", "address1": "201 S. Division St.", "postalCode": "48104-2201", "locality": "Ann Arbor", "administrativeArea": "MI", "firstName": "John", "email": "{% t key="test-email" /%}" }, "amountDetails": { "totalAmount": "102.00", "currency": "USD" } }, "paymentInformation": { "card": { "expirationYear": "2031", "number": "4895379987X11515", "securityCode": "089", "expirationMonth": "12" } }}{ "id": "6760630088136127303955", "status": "AUTHORIZED", "orderInformation": { "amountDetails": { "authorizedAmount": "102.00", "currency": "USD" } }, "tokenInformation": { "instrumentidentifierNew": false, "instrumentIdentifier": { "state": "ACTIVE", "id": "7030000000014911515" }, "shippingAddress": { "id": "F45FB3E443AF3C57E053A2598D0A9CFF" }, "paymentInstrument": { "id": "F45FC6785E3C31A2E053A2598D0A5346" }, "customer": { "id": "F45FB3E443AC3C57E053A2598D0A9CFF" } }}The response returns a customer token along with the payment instrument, shipping address, and instrument identifier tokens created for the transaction. Use the customer token ID in paymentInformation.customer.id to authorize subsequent payments without resending card details.
For the full set of required fields, response fields, and related operations, see Payments with Customer Tokens.
Authorize a payment with an existing customer token. To create a customer token first, see Manage Customer Tokens.
POST /pts/v2/payments
POST /pts/v2/payments
View API Sample Request
{ "clientReferenceInformation": { "code": "12345678" }, "paymentInformation": { "customer": { "id": "F45FB3E443AC3C57E053A2598D0A9CFF" } }, "orderInformation": { "amountDetails": { "currency": "USD", "totalAmount": "10.00" } }}{ "id": "7055928871556818104953", "status": "AUTHORIZED", "orderInformation": { "amountDetails": { "authorizedAmount": "10.00", "currency": "USD" } }, "paymentInformation": { "instrumentIdentifier": { "id": "7010000000016241111", "state": "ACTIVE" }, "paymentInstrument": { "id": "0F35E9CFEA463E34E063A2598D0A3FC2" }, "customer": { "id": "B21E6717A6F03479E05341588E0A303F" } }}For the full set of required fields, response fields, and related operations, see Payments with Customer Tokens.
Retrieve a Customer Token
Retrieve the details of an existing customer token.
GET /tms/v2/customers/{customerTokenId}
GET /tms/v2/customers/{customerTokenId}
View API Sample Request
{ "_links": { "self": { "href": "/tms/v2/customers/F2F3ADA770102B51E063A2598D0A9078" }, "paymentInstruments": { "href": "/tms/v2/customers/F2F3ADA770102B51E053A2598D0A9078/payment-instruments" }, "shippingAddresses": { "href": "/tms/v2/customers/F2F3ADA770102B51E053A2598D0A9078/shipping-addresses" } }, "id": "F2F3ADA770102B51E053A2598D0A9078", "buyerInformation": { "merchantCustomerID": "Your customer identifier", "email": "{% t key="test-email" /%}" }, "clientReferenceInformation": { "code": "TC50171_3" }, "merchantDefinedInformation": [ { "name": "data1", "value": "Your customer data" } ], "metadata": { "creator": "testrest" }}The {customerTokenId} is the customer token ID returned in the id field when you created the customer token. For details, see Manage Customer Tokens.
Delete a Customer Token
Remove a customer token that you no longer need.
DELETE /tms/v2/customers/{customerTokenId}
DELETE /tms/v2/customers/{customerTokenId}
View API Sample Request
DELETE /tms/v2/customers/{customerTokenId}A successful delete response returns an empty HTTP 204 No Content status. For details, see Manage Customer Tokens.
Provision a Network Token
Provision a network token directly for a card number using the Tokenized Cards API.
POST /tms/v2/tokenized-cards
POST /tms/v2/tokenized-cards
View API Sample Request
{ "source": "ONFILE", "card": { "number": "X622943123116478", "expirationMonth": "12", "expirationYear": "2026" }}{ "_links": { "self": { "href": "/tms/v2/tokenized-cards/518CA1611EF98697E063AF598E0ADFB9" }, "instrumentIdentifier": { "href": "/tms/v1/instrumentidentifiers/7031530000033441624" } }, "id": "518CA1611EF98697E063AF598E0ADFB9", "object": "tokenizedCard", "state": "ACTIVE", "enrollmentId": "15372f0f2bdf79725a1516de0288de01", "tokenReferenceId": "8d40eed53be76d63c665111dc1d46e01", "paymentAccountReference": "V0010013025104530884197510742", "number": "489537XXXXXX1624", "expirationMonth": "12", "expirationYear": "2034", "type": "visa", "card": { "suffix": "6478", "expirationMonth": "12", "expirationYear": "2026" }, "source": "ONFILE"}For the full set of required fields, response fields, and related operations, see Network Tokens.
Process a Payment Using a Token
After you create a customer token linked to a payment instrument, use it to authorize, capture, and refund payments without resending card details.
Process a Payment Using a Token
Authorize a payment using an existing customer token.
POST /pts/v2/payments
POST /pts/v2/payments
View API Sample Request
{ "clientReferenceInformation": { "code": "12345678" }, "paymentInformation": { "customer": { "id": "F60328413BAB09A4E053AF598E0A33DB" } }, "orderInformation": { "amountDetails": { "totalAmount": "102.21", "currency": "USD" } }}{ "_links": { "authReversal": { "method": "POST", "href": "/pts/v2/payments/6778647071126384904953/reversals" }, "self": { "method": "GET", "href": "/pts/v2/payments/6778647071126384904953" }, "capture": { "method": "POST", "href": "/pts/v2/payments/6778647071126384904953/captures" } }, "clientReferenceInformation": { "code": "TC50171_3" }, "id": "6778647071126384904953", "orderInformation": { "amountDetails": { "authorizedAmount": "102.21", "currency": "USD" } }, "paymentInformation": { "instrumentIdentifier": { "id": "7020000000010603216", "state": "ACTIVE" }, "shippingAddress": { "id": "F60328413BAE09A4E053AF598E0A33DB" }, "paymentInstrument": { "id": "F6032841BE33098EE053AF598E0AB0A5" }, "customer": { "id": "F60328413BAB09A4E053AF598E0A33DB" } }, "processingInformation": { "paymentSolution": "014" }, "processorInformation": { "approvalCode": "831000", "networkTransactionId": "0602MCC603474", "responseCode": "00" }, "reconciliationId": "EUHW1EMHIZ3O", "status": "AUTHORIZED", "submitTimeUtc": "2023-03-03T17:31:48Z"}For the full set of required fields, response fields, and related operations, see Payments with Customer Tokens.
Capture a Payment
To capture an authorization, include the request ID from the authorization in the URL for the capture request, along with the amount details in the request body.
View API Sample Request
{ "clientReferenceInformation": { "code": "ABC123" }, "orderInformation": { "amountDetails": { "totalAmount": "100.00", "currency": "EUR" } }}{ "_links": { "void": { "method": "POST", "href": "/pts/v2/captures/6662994431376681303954/voids" }, "self": { "method": "GET", "href": "/pts/v2/captures/6662994431376681303954" } }, "clientReferenceInformation": { "code": "1666299443215" }, "id": "6662994431376681303954", "orderInformation": { "amountDetails": { "totalAmount": "100.00", "currency": "EUR" } }, "reconciliationId": "66535942B9CGT52U", "status": "PENDING", "submitTimeUtc": "2022-10-20T20:57:23Z"}For the full set of required fields and an example request and response, see Captures.
Refund a Payment
To refund a payment, include the request ID from the authorization in the URL for the refund request, along with the amount details in the request body.
View API Sample Request
{ "orderInformation": { "amountDetails": { "totalAmount": "100.00", "currency": "EUR" } }}{ "_links": { "void": { "method": "POST", "href": "/pts/v2/credits/6699964581696622603955/voids" }, "self": { "method": "GET", "href": "/pts/v2/credits/6699964581696622603955" } }, "clientReferenceInformation": { "code": "1669996458298" }, "creditAmountDetails": { "currency": "eur", "creditAmount": "100.00" }, "id": "6699964581696622603955", "orderInformation": { "amountDetails": { "currency": "EUR" } }, "reconciliationId": "61873329OAILG3Q6", "status": "PENDING", "submitTimeUtc": "2022-12-02T15:54:18Z"}For the full set of required fields and an example request and response, see Refunds.
Subscribe to Network Token Updates
Create a digital signature key, then create a webhook subscription to receive notifications about network token lifecycle events, such as provisioning, updates, and device binding.
Create a Digital Signature Key
You must create a digital signature key to enable to send notifications to your servers.
POST /kms/egress/v2/keys-sym
POST /kms/egress/v2/keys-sym
View API Sample Request
{ "clientRequestAction": "CREATE", "keyInformation": { "provider": "nrtd", "tenant": "merchantName", "keyType": "sharedSecret", "organizationId": "merchantName" }}{ "submitTimeUtc": "2021-03-17T06:53:06+0000", "status": "SUCCESS", "keyInformation": { "provider": "NRTD", "tenant": "merchantName", "organizationId": "merchantName", "keyId": "bdc0fe52-091e-b0d6-e053-34b8d30a0504", "key": "u3qgvoaJ73rLJdPLTU3moxrXyNZA4eo5dklKtIXhsAE=", "keyType": "sharedSecret", "status": "Active", "expirationDate": "2022-03-17T06:53:06+0000" }}Create a Webhook Subscription
Subscribe to network token lifecycle event notifications.
POST /notification-subscriptions/v1/webhooks
POST /notification-subscriptions/v1/webhooks
View API Sample Request
{ "organizationId": "merchantOrgId", "productId": "tokenManagement", "url": "https://www.yoursite.com/webhooks/tms/notifications", "eventTypes": [ "tms.networktoken.provisioned", "tms.networktoken.updated", "tms.networktoken.binding" ]}{ "submitTimeUtc": "2023-04-12T10:15:30+0000", "status": "SUCCESS", "webhookId": "a1b2c3d4-e5f6-7890-abcd-ef1234567890", "organizationId": "merchantOrgId", "productId": "tokenManagement", "url": "https://www.yoursite.com/webhooks/tms/notifications", "eventTypes": [ "tms.networktoken.provisioned", "tms.networktoken.updated", "tms.networktoken.binding" ]}Get Details on a Webhook Subscription
Retrieve the details of an existing webhook subscription.
GET /notification-subscriptions/v1/webhooks/{webhookID}
GET /notification-subscriptions/v1/webhooks/{webhookID}
View API Sample Request
{ "submitTimeUtc": "2023-04-12T10:15:30+0000", "status": "SUCCESS", "webhookId": "a1b2c3d4-e5f6-7890-abcd-ef1234567890", "organizationId": "merchantOrgId", "productId": "tokenManagement", "url": "https://www.yoursite.com/webhooks/tms/notifications", "eventTypes": [ "tms.networktoken.provisioned", "tms.networktoken.updated", "tms.networktoken.binding" ]}For details on retrieving, updating, and deleting webhook subscriptions, see Webhooks.
Thanks for your feedback!
Last published: September 29, 2026